With each new appearance of NetAlly at Mobility Field Day, I find more value in my AirCheck G2. By now, I’m sure you’ve seen the videos of AirMapper in action, along with the new features of Link-Live. If you managed to miss it, now is a great time to catch up:
Like many of you, I’ve made the transition to a 90% work-from-home schedule, and that transition isn’t always easy. One of the problems I have is that I don’t have enough shelf space for all of the tools we use in the Wi-Fi industry. I also don’t have a neat way of managing the charging cables and keeping them all separate.
I know some of you are already nodding in agreement.
Those problems meant that when I needed my AirCheck G2, it might not be charged and was not readily at hand. But, with the many new features NetAlly added, I always seem to need my G2!
With that in mind, I decided to remedy the situation with wall mount caddies for each tool including built-in cable keepers to manage the chargers. I also wanted to ensure that each tool maintained its functionality while inside.
Before I go any further, I should provide a few caveats:
I am not a professional designer; those friends who spend a lot of time designing and 3D printing will be embarrassed for me, and that’s OK!
The results will not be pretty, but they will be functional.
I welcome feedback and suggestions for improvements!
I offer them to the community with apologies, free-of-charge, and the hope that they will also help make your office a bit more tidy and functional.
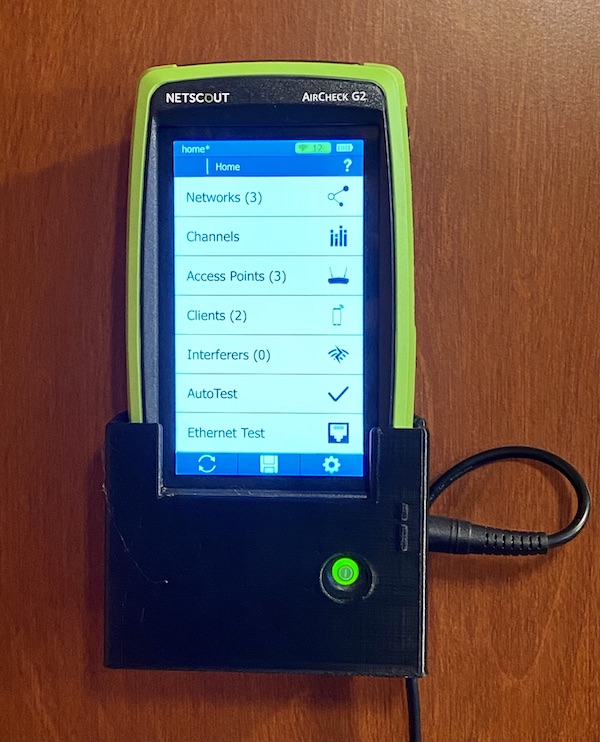
So, I present my first 3D printed design for the community:
I love it when companies show up to Mobility Field Day each year, ready to show their latest product, updates, and ideas.
Over the last several years, NetAlly (previously NetScout) has shown up each year to show off their updates and seek feedback on where they might focus next. NetAlly has proven to be receptive to feedback and responsive as they demonstrate advances in their handheld tools.
During the last year, we’ve seen the advancement of the Etherscope nXG to a survey tool with the introduction of AirMapper. This utility allows a wireless engineer to load a floorplan through Link-Live, import it to the Etherscope nXG, and then survey a facility, carrying only a single device. Once the survey is complete, it is re-synched to Link-Live for viewing, enabling easy, fast, and remote troubleshooting.
In today’s COVID-19 climate, remote troubleshooting is a significant boon to the tool. The simplicity of AirMapper makes it easy to ship to a local resource, who, with basic instructions, can perform a survey of the facility allowing the wireless SME’s to work in more places, faster, all from their home office.
I’m excited to see the latest news for the Etherscope nXG and AirMapper.
Link-Live is another product NetAlly continues to innovate on. Last year at MFD4, they announced several enhancements, including an API. The API enables the ability to create custom reports or integrate test results into existing customer systems.
I would love to see the API enable the ability to prepopulate sites or job lists and then archive old data based on labels.
The AirCheck G2 also received updates last year at MFD4, although the focus was clearly on the Etherscope nXG. It gained Wi-Fi6 visibility for management frames and headers, the ability to upload iPerf Test results to Link-Live, and a few other features. I’m guessing we’ll see a lot more information about the AirCheck G2 this year.
Finally, I would like to throw out a few things I hope to hear more about from NetAlly.
First, there are going to be some obvious questions about 6Ghz and Wi-Fi 6E. I’m sure NetAlly is working away on future products, and I hope they can begin to talk about what 6Ghz means for them.
I made a request last year, which you can find at the 20:50 mark here:
In short, I would like the AirCheck G2 and Etherscope nXG to have port profiles for a switch applied at the push of a button. Those profiles could be implemented by a technician installing an AP or other device without providing them access to an actual CLI or GUI or knowledge of how to do so. There are a LOT of ways to implement the idea with APIs, SNMP, or even Python scripts, so I know its not an easy task. It also highly variable depending on the switch vendor, model, and OS. But, considering the great functionality NetAlly continues to add to their devices, I am sure they are up to the challenge!
Whatever NetAlly brings to MFD5, I am sure it will significantly expand the functionality of their tools and make the lives of their users easier.
After the Mobility Field Day 4 live streams stopped, we secretly met with a secret company and were sworn to secrecy through a series of secret rituals and rites. OK, that might be a slight exaggeration, but there was definitely an unannounced company at MFD4.
That company, Celona, has now gone public, and it’s finally time to talk about what this could mean for the future of mobile devices inside enterprise networks. Here’s a hint: It is exciting!
Celona’s product is a fully integrated cloud based solution for CBRS or Citizens Band Radio Service. Before we go any further, understand that CBRS has nothing to do with truckers, Smokey and the Bandit, oversized antennas or anything near 27Mhz.
Instead, CBRS uses spectrum above 3.5Ghz and LTE technology with power output of up to 1watt/Mhz EIRP allowed by the FCC. The combination of higher power and LTE could mean a much broader coverage area than is usually offered by conventional Wi-Fi.
Further, clients that are CBRS capable must meet the much stricter 3GPP standards. Those standards highlight how weak and incapable the Wi-Fi Alliance is. Most importantly, those standards remove many of the client frustrations that many wireless engineers face daily such as poor 802.11r,k,v support.
Certification is required to install CBRS equipment and is attained after completing an online course. This course from Google cost $599 for the course and online exam, which makes it accessible to most wireless engineers who may decide to expand their craft and marketable skills. The certification is required as there are licensing requirements and frequency coordination, similar to those proposed for the 6ghz band due to incumbents in the space.
The best part of CBRS is that it allows enterprise customers to take ownership of their LTE coverage and data. Celona’s solution will enable ownership of the data path from the client device through the CBRS system and on to either internally hosted systems or out to the internet.
A quick google search will bring up a slew of articles screaming, “CBRS will kill Wi-Fi.” That is hardly the case. However, there are plenty of places where CBRS will be an excellent solution. For example, areas with high roaming requirements will benefit from the LTE underpinnings. Additionally, in medical and hospital systems iPhones, which are regularly used SIM-less to ensure HIPAA and PI data protection, will be able to connect to a hospital managed and controlled CBRS system.
Celona’s role in this space is providing the cloud based management solution and hardware. It’s easy to imagine them as the Mist Systems of CBRS, and that’s not far from the truth. Their business model is especially useful in CBRS, because it doesn’t require extensive knowledge of LTE standards to configure and manage a solution.
Before Celona’s vision can become fully realized, there are a few barriers to entry. In short, we need a skilled workforce that is capable and licensed to install and manage the equipment and appropriate tools required to design and troubleshoot installations.
The tools challenge is significant. Spectrum planning and coverage design is more complicated due to frequency coordination and licensing. Spectrum Analyzers which are currently capable of checking 3.5Ghz are very expensive and each new tool comes with a learning curve.
Considering the number of devices which support Band 48 out of the box, including the new iPhone, devices are already available. Celona brings the network that enterprises can install. With the right tools and enough licensed engineers, Celona and CBRS could have a very bright future.
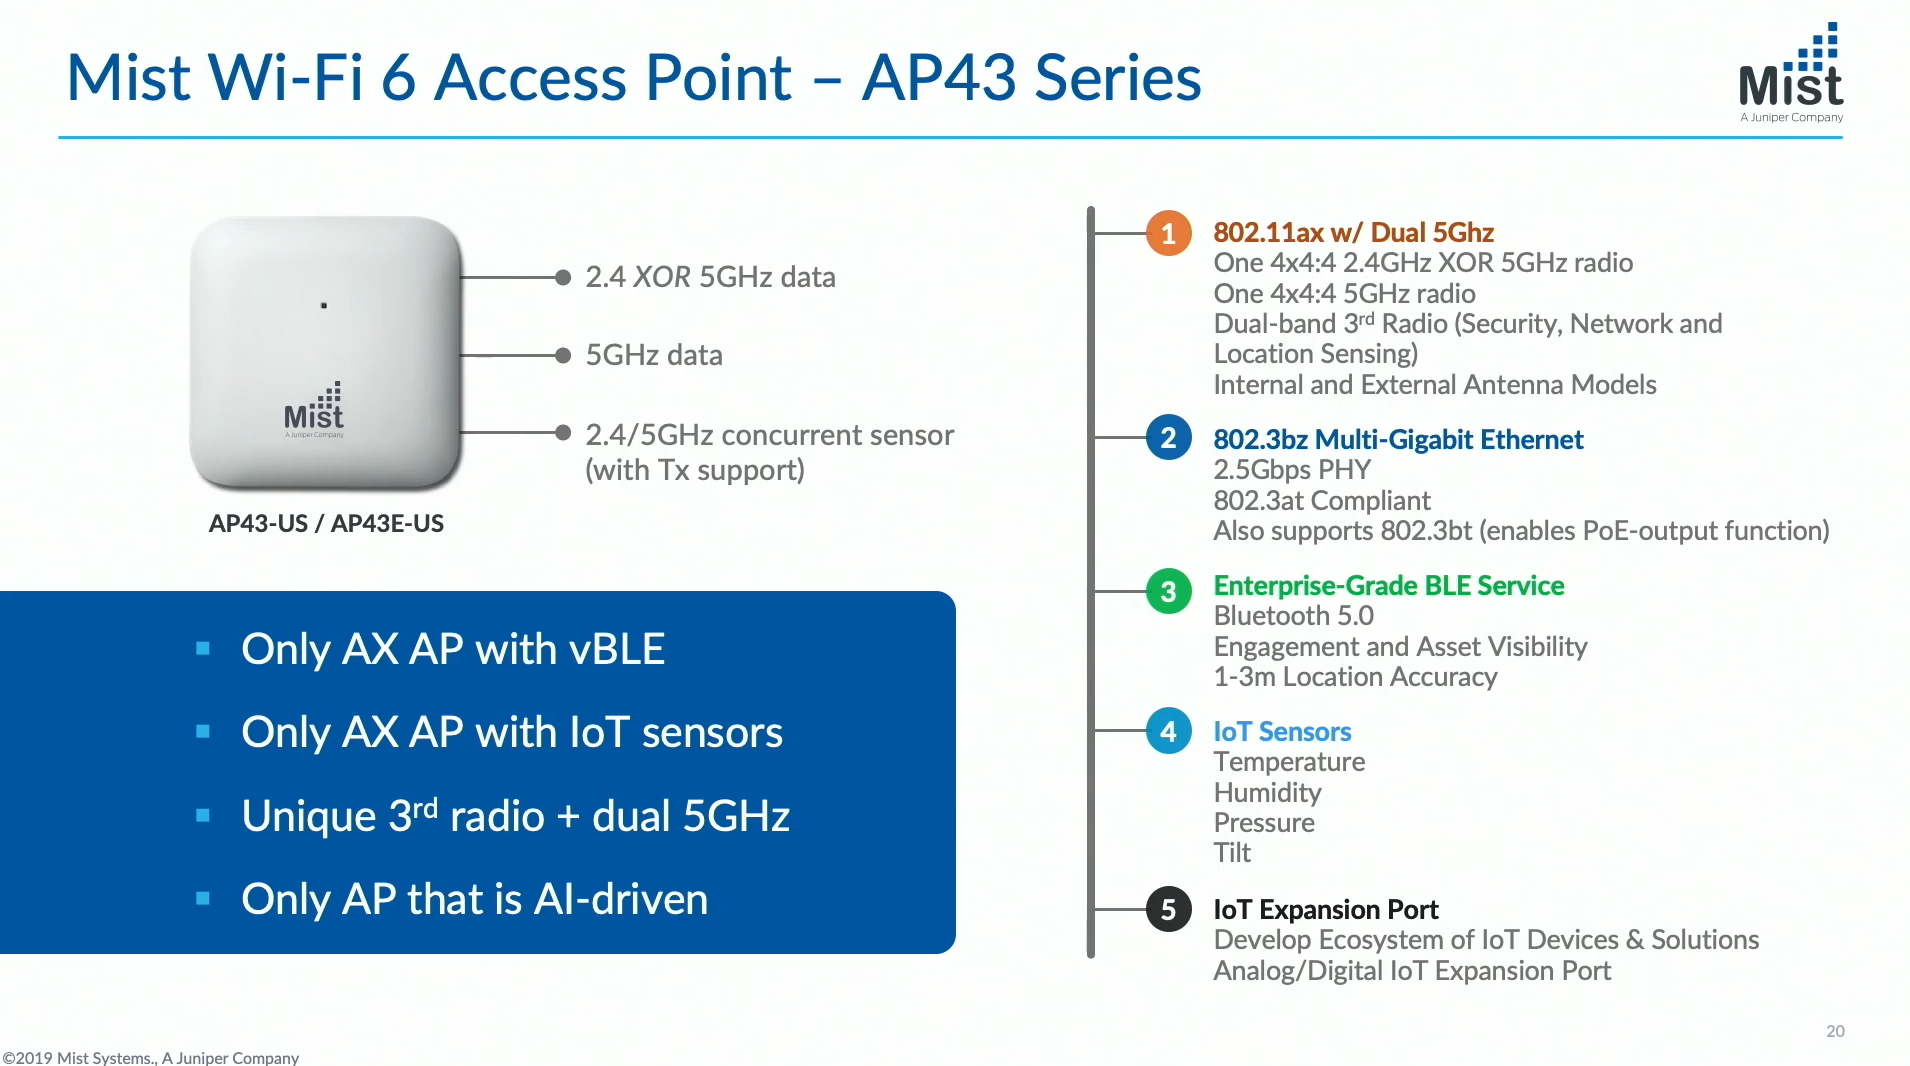
At Mobility Field Day 4, we heard from a few companies which are working hard to extend the capabilities of their AP’s well past only serving traditional 802.11 clients. Mist Systems, a Juniper Company, was one such presenter, and they might have a fantastic new platform with their latest hardware, the AP43.
The idea is simple. Most campuses have AP’s covering their entire environment. In many large environments, they share that ceiling space with other types of sensors or networks. These overlay networks may include building and security sensors, Zigbee control of lights or door locks, and test sensor networks.
In many ways, Mist has been a bit ahead of this curve. Their AP’s already included an IoT port, which enabled triggering devices like door locks or sensing through a variety of GPIO sensors.
Their new AP43 is a dual 5Ghz capable 802.11ax access point. It includes 802.3bz NBASE-T port to ensure the network port never becomes a bottleneck. That port also includes 802.3bt power capabilities so that it can pass power out of its secondary port, enabling it to daisy chain any 802.3af network device. The obvious candidate here is the BT11, Mist’s BLE sensor.
Further, each AP43 includes built-in sensors to provide temperature, humidity, barometric pressure, and angle/orientation. The inclusion of these sensors come with some unique engineering challenges. If Mist is successful in getting them to work appropriately, it could be a game-changer.
The biggest challenge when considering environment monitoring on an access point is heat. Anyone who has ever touched an AP that has been on for a while knows it can be hot. Thanks to the first law of thermodynamics, we know that all energy consumed by the AP that doesn’t get radiated as RF is instead transformed to heat. But that heat output isn’t consistent. It will vary based on the transmitter duty cycle or CPU load of the AP.
Additionally, that heat creates a micro-climate around the AP, which will lower the humidity percentage since warm air holds more water than cool air. Warm air is also less dense, which may affect the barometric pressure sensor.
The humidity/heat problem is further exacerbated by the fact that all water in the air is absorbing a small amount of the radiated RF power.
Finally, the ceiling can be many degrees warmer than in the same room at desk level.
These are challenges that I am sure Mist has taken into account, and the fact that they can work through them is impressive. Having environmental reporting built into the AP could make for a fantastic use case for building managers.
Moving down the list, the barometric pressure and orientation/angle sensor have some compelling use cases. By comparing atmospheric pressure among AP neighbors, Mist should be able to tell which AP’s are on the same floor in multi-floor buildings. This information could significantly impact 802.11k neighbor reports. By excluding AP’s which may be heard by the AP, but are obviously on a different floor, the chances of a client choosing a better roam candidate increases.
By comparing atmospheric pressure among AP neighbors, Mist should be able to tell which AP’s are on the same floor in multi-floor buildings. This information could significantly impact 802.11k neighbor reports.
Finally, the angle sensor can help identify AP’s mounted on a wall versus a ceiling. With that information and Mist’s ML backend, it should be able to better locate clients in RTLS environments.
These new sensors extend the AP capabilities well past the traditional use cases. Can Mist pull off the environmental monitoring? Can they adjust their neighbor report automatically based on elevation? I’m excited to play with these features in the future and get to the bottom of these answers and more.
Either way, it is clear that Mist has built the AP43 as a platform they can innovate with and I’m excited to see where they take it.
Take a look and tell me what you think:
Mist Systems Mist AI for AX – Wi-Fi 6 from Gestalt IT on Vimeo.
Maybe it’s just me. I’ve always felt like SD-WAN was kludgy. Every time I listen to an explanation of how it works, I think of the picture of a mechanic putting duct tape on the wing of an aircraft while passengers sit inside awaiting departure. I imagine sitting in the window seat, watching it take place and asking the questions: “Is that really the best way to fix this problem?” “Are we trusting duct tape to hold the wing together?” and even “Shouldn’t the wing hold itself together?”
128 Technology is a five-year-old company focused on creating the best SD-WAN solution. As a new company, building a new product to answer a specific set of challenges, 128 Technology had an empty toolbox. That also meant they had no baggage to bring with them. It was a fresh start. They could make their solution be anything they wanted it to be.
According to Sue Graham Johnston, “…we decided to reorient networking to focus on the session, we can get rid of about 30 years’ worth of technology workarounds and overlays…” In case you are wondering, yes, that is duct tape she’s talking about.
That one statement piqued my interest, set the stage, and explained much of how their model works. It is simple enough to brilliant.
128 Technology uses a 5-tuple to identify each session: source and destination IPs, source and destination ports, and the protocol. When the session is built between the ingress and egress router, the first packet is encapsulated with 150-200 bytes of metadata to establish the session. After the session is established, no further encapsulation is needed as the ingress and egress routers have all of the data that is necessary. When each packet hits the ingress router, the source and destination addresses are changed until it hits the egress router. (Does this sound a bit like NAT? Because its NAT for SD-WAN.)
That’s their magic: No encapsulation, lower overhead, no need to fragment larger frames to provide space for additional headers, and significant bandwidth savings.
Now that you understand the basics of how 128 Technology builds sessions, it’s also essential to see how they integrate security. After all, this is intended to be an SD-WAN solution where data will traverse the internet.
Here again, there are a few basics to understand. All metadata to establish sessions is encrypted. Unencrypted traffic between Ingress and Egress routers is encrypted with AES128 or AES256. SSL or other encrypted traffic doesn’t need to be re-encrypted, so 128 Technology doesn’t. That reduces latency, complexity, and overhead. The last important piece of the puzzle is that the 128 Technology network operates as a zero-trust security environment. All data sessions must have a service policy created to allow traffic to flow. No service-policy means no traffic.
The last consideration is how to manage the SD-WAN environment. One router in the network is assigned the role of Conductor. All routers and the Conductor run a single code base, ensuring consistency in bug fixes and behavior. The Conductor is not required for configuration or operation but provides a central point configuration of all devices.
When I consider the takeaways from Networking Field Day Exclusive with 128 Technology, one thing jumps out far above the rest. Their focus on simplicity and the most critical part of data networks: the data session. I feel the solution is well thought out, and based on the customers that are using it in production; it seems the execution delivers on their promises.
The only remaining question I have do not relate to their technology at all.
When will 128 Technology be acquired?
Who will acquire them?
Will it be to include them into an existing full-stack solution or acquired to be used by a service provider in their internal networks?
I hope that this will be a product that we can all benefit from as direct customers.
Take time to watch the videos and see if you agree.
128 Technology Networking Platform Overview from Gestalt IT on Vimeo.
To catch you up, I came into MFD3 less enthusiastic than most regarding Netscout and their lineup of handheld network tools. With that said, I took notice in 2017 at MFD2 that the company was paying attention to feedback and looking for suggestions on how to improve their product offerings.
One of those improvements for MFD3 was a further expansion of the capabilities of Link-Live.
Link-Live has matured into a tool for consolidating all of your test results AND managing the tools at your disposal.
Many of these updates were covered in the LinkRunner and AirCheck updates, but bear repeating:
AirCheck software updates
AirCheck G2 Profile sharing
Packet capture sharing
Simplified App search for the LinkRunner G2
Files Folder – There is a lot more available that can be uploaded and saved to a project folder
Full AutoTest results
The most significant aspect of the Link-Live updates is a clear direction to make the LinkRunner and AirCheck entirely manageable without a Windows PC. This is a substantial shift from the past, and I am very excited to see it taking place because I stay away from Windows as much as possible.
So, the ultimate question, does the updates to the AirCheck G2 and LinkRunner G2, along with the new features of Link-Live make me change my opinion? Do I now see the ROI? Would I spend my budget, either personal or business on either tool?
The answer is “yes” to all of the above. With the divestiture of the handheld tools from Netscout into its own company, I expect the future to be bright. I think we will continue to see updates, new use cases, and great support. The handheld network tools team has won me over, and I’m happy to change my previous opinion. I will acquire both tools over the coming months for my personal toolkit, as I know my employer doesn’t have the budget. I don’t think there is more to say.
Mobility Field Day 3 was great! If you missed it, I will be releasing a few blogs over the coming weeks from my experience at the event. In the meantime, you can watch all of the videos here:
One of the most interesting developments this morning was the announcement from Netscout that it was divesting its handheld network test division to StoneCalibre.
While this announcement creates quite a few questions around the future, I firmly believe that the great group of people who have brought us the recently announced LinkRunner G2 v2.0 and AirCheck G2 v3.0 software updates are going to keep killing it. I’m excited to see what they bring to us in the future and hope to see them presenting once again at Mobility Field Day 4.
I participated in the Tech Field Day Extra events at Cisco Live. One of the presenters, VIAVI has been floating near the edge of my awareness for a while, so it was great to see their presentation and get a better understanding of the VIAVI Observer Platform.
Anytime I see a presentation from a monitoring solution there are three questions that I ask:
“How useful would this be for tier one technicians?”
I usually consider that question from both the perspective of a NOC and also a helpdesk technician. If a monitoring tool isn’t practical for those roles, I am the one who gets stuck using it all of the time, and therefore, it has no place in my environment.
“How useful would this tool be for me?”
If the tool can’t offer enough information to be useful for a senior engineer, I don’t want to pay for it. It also increases the complexity of passing trouble tickets up the chain as each person has to start back at zero in their own tool.
“Does this make it easier to find the problem, or just add another step?”
Monitoring tools which only show up/down status and system logs have very little use for me. I can easily find those by other means, or on the device itself, faster than I can fire up a browser, click on a bookmark, log in, navigate through a device tree, etc.
VIAVI has provided the right answers to all three questions.
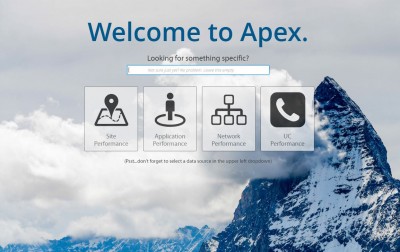
The starting page for Observer is simple. It doesn’t take forever to load as it attempts to pull data from many different sources to provide a general health overview that rarely has anything to do with the reason you opened the application. Instead, Observer’s search box is ready for any relevant text the technician may know about the problem. If you have an IP, MAC address, VLAN, or hostname, those are all great places to start. You can also choose to push into a more generalized monitoring view like Application Performance, Network Performance, etc.
The search box is the beauty of the application for me. VIAVI indexes all of the monitoring sources for things like MAC addresses, IP addresses, interfaces, usernames, and other metadata and then correlates that information together. A technician doesn’t need to look up an IP address in the ARP table, get the MAC address, look up the MAC address in the MAC address table to get the port, then check the port for errors. A search on the IP address will provide all of that information, quickly! Since VIAVI also knows the assigned VLAN, it quickly displays “Here’s a bad actor on the same VLAN that is flooding the VLAN with bad frames.” The technicians can find problems without looking directly for them. That’s a huge win. This is not looking for a needle in a haystack. This is turning on an extremely powerful magnet and letting the needle come to you.
Another great feature is that Observer creates a baseline from the information that it acquires. With that baseline that understands system X typically runs at 75 percent utilization, but is now running at 90 percent, more problems quickly float to the surface. Additionally, the baseline filters out the normal abnormal. Is it “normal” for that system to run at 75 percent utilization all of the time? Maybe so. If it is, a technician doesn’t need a warning about it. It might be operating as designed.
If a technician can’t find a solution through the dashboard, the next engineer who picks up the problem will want to dig deeper. Thanks to the stored packet traces which provided all of the metadata the technician used, the engineer can take a look at the actual packets. Aside from the standard fields like source and destination, IP’s and ports, Observer also includes a patent-pending User Experience Score which is a 1-10 scale to aid in finding problems faster within the trace files.
Taking the click-through troubleshooting one step further, Observer creates Application Dependency Maps which aid an engineer to understand all of the dependent systems quickly and which are affecting performance.
When considering my initial three questions I proposed, I feel VIAVI’s Observer is providing pretty compelling answers for each. I look forward to learning more.
In many ways, Tech Field Day offers a similar solution to VIAVI Observer. TFD allows me to filter through the marketing hype, and get to the bottom of a product or solution and whether it will be useful to me. Don’t forget to check out the many other videos and content created by Tech Field Day at Cisco Live.
In case you missed it, a couple of weeks ago I wrote about my experience testing Cape Networks solution for wireless monitoring. You can find that post here. I first learned about Cape Networks at WLPC, and was able to have a conversation with them at Mobility Field Day 2 that you can watch here.
One point that continues to impress me about Cape Networks is the ability to test much more than WiFi.
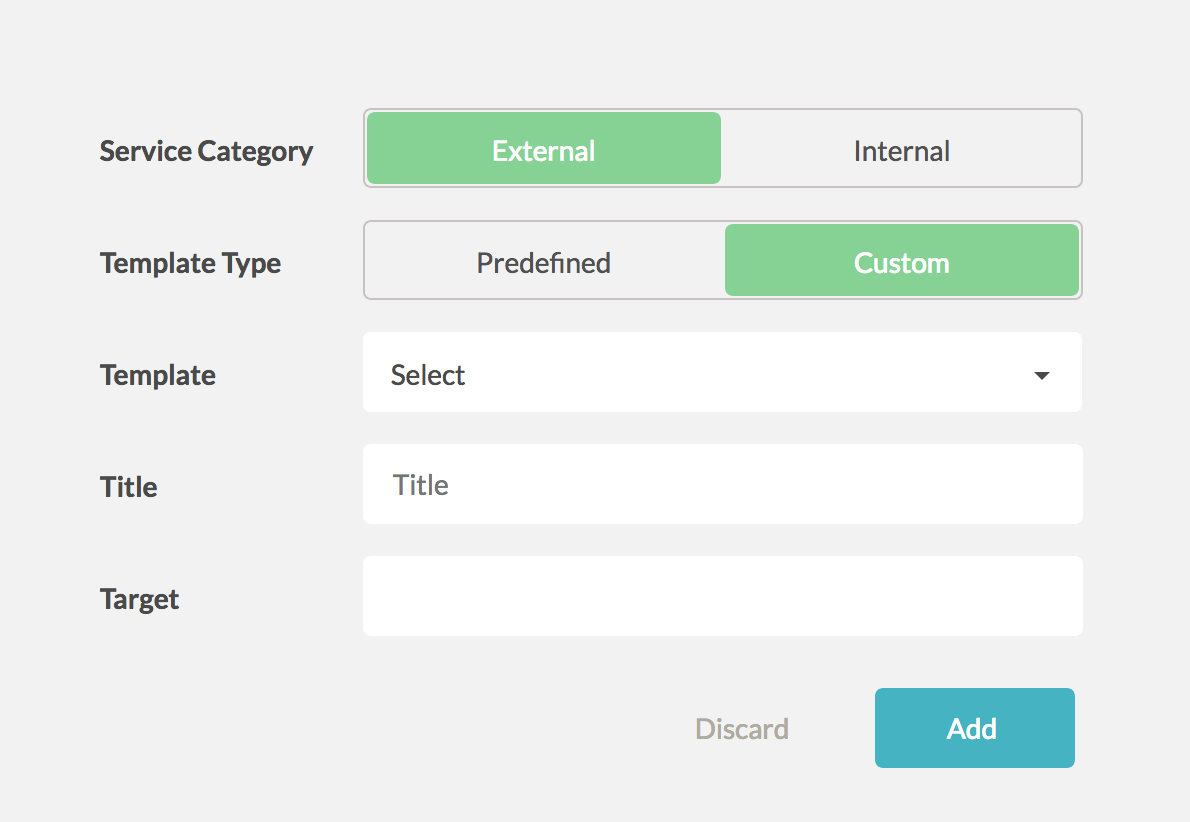
It really comes down to the strength of the dashboard and the various tests that each sensor can run. The ability to test against internal and external systems is one example.
Each sensor can test against web servers, iperf, or custom ports of your choosing.
Users can configure a test to run against predefined external websites like Adobe Creative Cloud, Microsoft Office 365, Dropbox, and others. But, the sensor can also test against custom websites, checking not just “Is it up?” but HTTP status codes and latency as well.
I’ve used this recently to help an outside vendor truly understand that “No, our network is not to blame” for the high latency their users are complaining about.
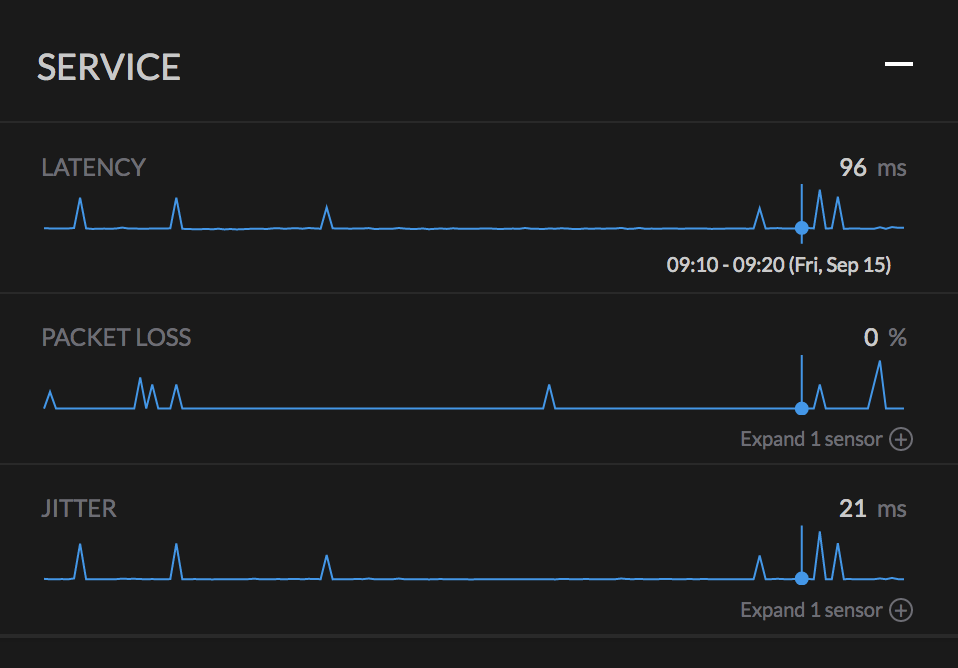
When all other external websites are seeing ~20ms latency, and your web application is averaging ~90ms over a period of weeks, guess what? YOU have a problem!
Averaging 96ms of latency. Maybe that’s why the application is always slow?
Obviously, due to the nature of these tests being performed over WiFi, latency, jitter, and packet loss are all expected to be a bit higher, especially if they are performed during times of peak WiFi utilization. However, when you have tests to compare across multiple online services, it’s easy to notice standout patterns.
One feature request I would make to Cape Networks is this: Allow test to be ran across both the LAN and WiFi connections. If we can compare across these two mediums, we may also see additional information useful in diagnosing wireless issues.
Have you found a non-WiFi use for the Cape Networks sensors? If so, tell me about them in the comments.
As a MFD2 delegate, I did receive a free sensor from Cape Networks and various stickers and other low value (but tasty) snacks. All other expenses for MFD were covered by Tech Field Day. I was not compelled to write about Cape Networks in any way other than personal user experience. My employers decision to purchase sensors was based solely on the user experience and ease of problem resolution.
How many times have we heard that mantra? As wireless engineers we know all of the intricate details that are required to be in place before wireless “just works.” We often find ourselves trying to explain this to people who see wireless as magic, and us as the magicians. They don’t care about the intricacies of roaming. They don’t care about the underlying systems, many of which we rarely control. DHCP, DNS, RADIUS, and ultimately the services they are trying to connect to.
Assuming a medium to large sized corporate environment, there is likely someone (a team) responsible for the DNS, DHCP, and Radius, and that is not likely to be the same team responsible for wireless. In very large environments, the LAN team that even provides the network cable for the AP may be a different team.
Further increasing the confusion is that problems can often appear isolated, with only a small group of users experiencing the issue.
Then the troubleshooting must begin. Is it a client issue? Were drivers or firmware recently updated on the users systems? Is there a common location, time, or AP that the experience is related to? The list of questions begin to build.
I ran into this in my own network recently. Users were complaining of being unable to connect to wireless. The problems were reported from various locations slowly over a number of days. No particular client was having consistent issues, and I never saw the problem on a customers computer while they were having it. I began looking through logs and following pretty standard troubleshooting steps. Nothing came up. It was as if the problem didn’t exist, yet I was hearing about it often enough to believe that it did.
Considering that I had just returned from Mobility Field Day 2 and participated in the Cape Networks session, I had an idea. Cape Networks provided delegates with a sensor to test. I spoke with my manager at work, a very smart guy (he hired me, right?) who agreed it would be OK to test the sensor in our environment.
The secret to the Cape Networks sensor is that it IS a client. It sees what a client experiences and its entire function is to report on the user experience. It is cloud connected, with an intuitive dashboard, that makes setup and management easy, and remote troubleshooting painless. You really should watch the Cape Networks presentation!
After installing the sensor and configuring the device for our wireless network and the internal services that I wanted it to test, I walked away and forgot about it for a day.
The next morning, I logged back in, and my issue was staring me in the face. DHCP
The time to get a DHCP address was all over the map, peaking as high as 11 seconds. Problem found! Users who experienced those peaks would clearly have issues connecting; add in their own impatience, maybe turning off and on wireless, and of course they couldn’t connect.
Before and after changes were made to DHCP.
What was even more important was that I now had clear metrics that I could take to my team that manages DHCP. I could point to the problem, and then after we developed and implemented a resolution, I was able to point to the same metrics as proof that our plan worked.
As you might have guessed, complaints and rumors of complaints quickly died away.
As a MFD2 delegate, I did receive a free sensor from Cape Networks and various stickers and other low value (but tasty) snacks. All other expenses for MFD were covered by Tech Field Day. I was not compelled to write about Cape Networks in any way other than personal user experience. My employers decision to purchase sensors was based solely on the user experience and ease of problem resolution.


 According to Sue Graham Johnston, “…we decided to reorient networking to focus on the session, we can get rid of about 30 years’ worth of technology workarounds and overlays…” In case you are wondering, yes, that is duct tape she’s talking about.