Geek Tools – Cape Networks for more than just wireless

In case you missed it, a couple of weeks ago I wrote about my experience testing Cape Networks solution for wireless monitoring. You can find that post here. I first learned about Cape Networks at WLPC, and was able to have a conversation with them at Mobility Field Day 2 that you can watch here.

One point that continues to impress me about Cape Networks is the ability to test much more than WiFi.

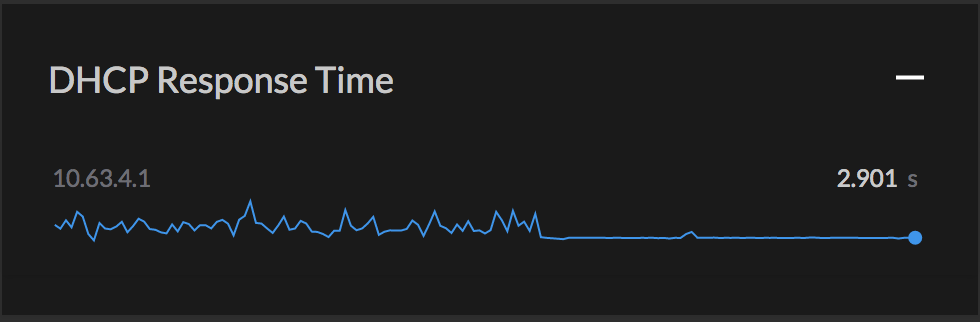
It really comes down to the strength of the dashboard and the various tests that each sensor can run. The ability to test against internal and external systems is one example.

Screen Shot 2017-09-15 at 11.57.05 AM

Each sensor can test against web servers, iperf, or custom ports of your choosing.

Users can configure a test to run against predefined external websites like Adobe Creative Cloud, Microsoft Office 365, Dropbox, and others. But, the sensor can also test against custom websites, checking not just “Is it up?” but HTTP status codes and latency as well.

I’ve used this recently to help an outside vendor truly understand that “No, our network is not to blame” for the high latency their users are complaining about.

When all other external websites are seeing ~20ms latency, and your web application is averaging ~90ms over a period of weeks, guess what? YOU have a problem!

Screen Shot 2017-09-15 at 12.06.02 PM

Averaging 96ms of latency. Maybe that’s why the application is always slow?

Obviously, due to the nature of these tests being performed over WiFi, latency, jitter, and packet loss are all expected to be a bit higher, especially if they are performed during times of peak WiFi utilization. However, when you have tests to compare across multiple online services, it’s easy to notice standout patterns.

One feature request I would make to Cape Networks is this: Allow test to be ran across both the LAN and WiFi connections. If we can compare across these two mediums, we may also see additional information useful in diagnosing wireless issues.

Have you found a non-WiFi use for the Cape Networks sensors? If so, tell me about them in the comments.

As a MFD2 delegate, I did receive a free sensor from Cape Networks and various stickers and other low value (but tasty) snacks. All other expenses for MFD were covered by Tech Field Day. I was not compelled to write about Cape Networks in any way other than personal user experience. My employers decision to purchase sensors was based solely on the user experience and ease of problem resolution.

Geek Tools: Ekahau’s New Sidekick

Today Ekahau went public with a new device that moves them from just another industry player to leading the wireless survey tool industry.

The Ekahau Sidekick answers a lot of questions that have been plaguing those of us who regularly do wireless surveys. To understand why it is such an important move for the company, you first need to understand a few of the pain points that comes with being a wireless engineer.

  • Some USB3 hubs create significant RF noise that can affect wireless survey results.
  • Many 802.11ac USB adapters have very poor consistency between devices.
  • Laptop batteries are often non-removable, requiring regular recharging when used for survey work.
  • How reliable is a 3×3:3 USB adapter when all antennas are internal without physical separation? (Short answer, they aren’t)
  • A laptop with 4-5 dongles connected to it is difficult to manage. I know many people who have snapped off a USB dongle in their career.

So, how does the Sidekick do it different?

  • It is a dual 802.11ac radio system with 3×3:3 radio chains and the appropriate antennas.
  • It has a very fast dual band spectrum analyzer with incredibly high resolution.
  • The device has it’s own 8 hour battery, and does not draw from the laptop battery.
  • Nothing to snap off and break. This thing is very rugged, and easily hangs from the hip as the engineer moves around.

So the big question is cost. The Ekahau Sidekick cost $2995US. The question of annual support was not answered during the presentation. This assumes the user already has an active license for ESS or ESS Pro.

Most importantly, by separating the hardware and drivers into a unique specialized unit, the Ekahau Sidekick can be used by those of us who use MacOS just as easily as those crazy few still using Windows. Drivers and firmware are no longer a concern.

Well done Ekahau!

You can find out more at: https://www.ekahau.com/sidekick


I received nothing to write this post. I am an active Ekahau user, and purchase licenses and support just like any other user. Hopefully, I will be able to convince my manager that he should fund one more purchase…

Geek Tools – Cape Networks for Wireless Monitoring

“Wireless isn’t working!” – everyone

How many times have we heard that mantra? As wireless engineers we know all of the intricate details that are required to be in place before wireless “just works.” We often find ourselves trying to explain this to people who see wireless as magic, and us as the magicians. They don’t care about the intricacies of roaming. They don’t care about the underlying systems, many of which we rarely control. DHCP, DNS, RADIUS, and ultimately the services they are trying to connect to.

Assuming a medium to large sized corporate environment, there is likely someone (a team) responsible for the DNS, DHCP, and Radius, and that is not likely to be the same team responsible for wireless. In very large environments, the LAN team that even provides the network cable for the AP may be a different team.

Further increasing the confusion is that problems can often appear isolated, with only a small group of users experiencing the issue.

Then the troubleshooting must begin. Is it a client issue? Were drivers or firmware recently updated on the users systems? Is there a common location, time, or AP that the experience is related to? The list of questions begin to build.

I ran into this in my own network recently. Users were complaining of being unable to connect to wireless. The problems were reported from various locations slowly over a number of days. No particular client was having consistent issues, and I never saw the problem on a customers computer while they were having it. I began looking through logs and following pretty standard troubleshooting steps. Nothing came up. It was as if the problem didn’t exist, yet I was hearing about it often enough to believe that it did.

Considering that I had just returned from Mobility Field Day 2 and participated in the Cape Networks session, I had an idea. Cape Networks provided delegates with a sensor to test. I spoke with my manager at work, a very smart guy (he hired me, right?) who agreed it would be OK to test the sensor in our environment.

The secret to the Cape Networks sensor is that it IS a client. It sees what a client experiences and its entire function is to report on the user experience. It is cloud connected, with an intuitive dashboard, that makes setup and management easy, and remote troubleshooting painless. You really should watch the Cape Networks presentation!

After installing the sensor and configuring the device for our wireless network and the internal services that I wanted it to test, I walked away and forgot about it for a day.
The next morning, I logged back in, and my issue was staring me in the face. DHCP

The time to get a DHCP address was all over the map, peaking as high as 11 seconds. Problem found! Users who experienced those peaks would clearly have issues connecting; add in their own impatience, maybe turning off and on wireless, and of course they couldn’t connect.

Before and after changes were implemented to resolve the DHCP issues users experienced.

Before and after changes were made to DHCP.

What was even more important was that I now had clear metrics that I could take to my team that manages DHCP. I could point to the problem, and then after we developed and implemented a resolution, I was able to point to the same metrics as proof that our plan worked.

As you might have guessed, complaints and rumors of complaints quickly died away.

My organization has since made the decision to invest in sensors from Cape Networks. Their reporting and ease of use make for an unmistakable value. I strongly recommend that you also check them out.

As a MFD2 delegate, I did receive a free sensor from Cape Networks and various stickers and other low value (but tasty) snacks. All other expenses for MFD were covered by Tech Field Day. I was not compelled to write about Cape Networks in any way other than personal user experience. My employers decision to purchase sensors was based solely on the user experience and ease of problem resolution.

Looking ahead to Mobility Field Day 2

This week I am attending Mobility Field Day 2, taking place in San Jose, CA! This is my seventh event with Tech Field Day and I am excited for what the week has to offer.
As an attendee at Network Field Day 8 and 9, the focus in networking was towards Datacenter and WAN. During that same time, my personal career was arcing towards wireless. I was reading, thinking, and practicing a lot of wireless for a major global manufacturing company. I left from those events feeling amazed at all that was happening within the realm of networking, but also feeling like an imposter.
I wasn’t worrying much about SDN WAN, I was too focused on designing and deploying high density wireless in a manufacturing space. I wasn’t thinking about data center, but I was instead providing coverage to warehouses in the million+ sq/ft range.
A lot has happened in my career since those events, and I have made myself at home in the realm of wireless. I continue to learn and grow as a wireless engineer, and Mobility Field Day is another step in my development. More importantly, I’m at an event that speaks to my passion. Tech Field Day events are always incredibly informative, but this one just resonates!
We have some great presenters this week, including Cape Networks, Mist Systems, Mojo NetworksNetscout, and Nyansa.
Aside from the presenters, Mobility Field Day 2 has some awesome delegates, many of whom I consider friends. The opportunity to exchange ideas, ask questions, and participate with them is very exciting.
Speaking of participation, my absolute favorite part of Mobility Field Day is that everyone can participate. Nearly all of the sessions are live streamed. You can watch with us live, send tweets or DM’s, and be part of the event yourself.
Please feel free to send me your questions on Twitter. I will be happy to ask them as time allows and you too can participate in what looks to be another great Tech Field Day event!

Geek Tools – Installing Spectools on WLPC Odroid

spectoolsscreenOne of the maker sessions from WLPC was setting up an Odroid for use as a network tool. It was a great session and I hope to see more of these at future WLPC’s. Once the videos are posted, you will be able to find the link here.

The first thing I wanted to try was installing Spectools on my Odroid to use with my Metageek Spectrum Analyzers. I have two Metageek Wi-Spy DBx’s and thanks to the 2017 WLPC bag, one Wi-Spy 2.4x.

The Wi-Spy 2.4x analyzer is supported in a much older version of Spectools. If you only own that one analyzer, simply run the following from the CLI:

sudo apt-get install spectools

On the other hand, if you want to use Spectools with a DBx, you must compile from the latest version. This takes a bit more work as it must be compiled from the source code. After fumbling around with it along with Jerry Olla we were both able to get it successfully installed and working.

Here are the directions which worked for both Jerry and I.

  1. Install the required prereqs:
sudo apt-get install libgtk2.0-dev libusb-dev build-essential

2. Clone the Spectools package:

git clone https://www.kismetwireless.net/spectools.git

3. Change to the Spectools directory:

cd spectools

4. Now, the fun part. The included config.guess will not recognize the Odroid. However, the distribution installed on the Odroid includes a MUCH newer version that will, so we need to copy it to the spectools directory:

cp /usr/share/misc/config.guess config.guess

5. Now we can follow the standard process to compile Spectools to operate on the Odroid.

./configure
make
make install

And with that, Spectools should now support the Metageek dbx. Install VNC, and you have an easily deployable sensor.

Up next, installing Websockets for wi-spy